

How awkward it feels when the sentence you are typing dangles at the top of your next page, as there is not enough space on the previous page, thereby changing the complete meaning of the sentence. How to solve this problem?
In Google Docs, page margins are automatically set to one inch on all sides – top, bottom, left, and right. But sometimes, it becomes important to adjust the margins of your document just to make it right. By changing the margins in Google Docs, you can enhance the readability and professionalism of your documents. It might be a school project or an official report, knowing how to change margins in Google Docs is of the utmost importance.
In this step-by-step guide, you can learn How to change margins in Google Docs? But before that, let us see why changing margins in Google Docs matters.
What Are Margins In Google Docs?
The first step in creating a document is setting the margins. Margins in Google Docs tell us about the document layout and alignment of the text on the page.
Why Margins Matter?
Margins in Google Docs matter a lot. Changing margins in Google Docs is essential for various reasons. Proper margin settings are key to creating visually appealing documents that meet even the formatting standards. The setup dialog box allows easy margin adjustments, ensuring consistency and a professional look. If you want to create a well-structured document, understanding how to change margins in Google Docs is necessary.
Step-by-Step Methods On How To Change Margins In Google Docs?
Here are the steps on how to change margins in Google Docs to customize the look of your documents.
1. How To Change Margins In Google Docs Using Page Setup:
The first step on how to change margins in Google Docs is very simple. To change margins in Google Docs using Page Setup, click on Files in the menu, go to “Page Setup” options, and specify the margins as required. Now, if you want the same margin for future use, then select the “Set as default” option.
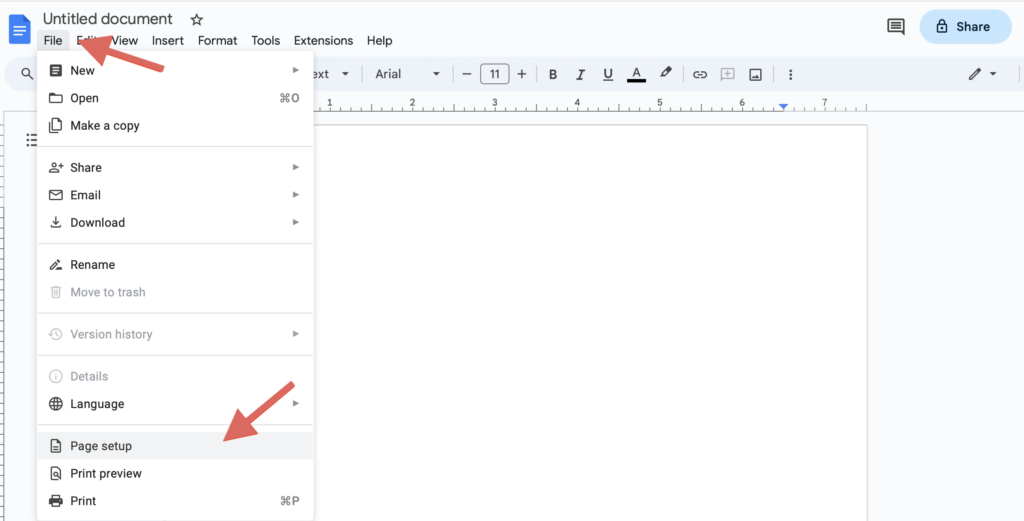
Step 1: Click on “File”
- Open a new document or any required document in Google Docs.
- Then click on File in the menu bar
Step 2: Select Page Setup:
- Go to the Page Setup option
- Click on “Page Setup”
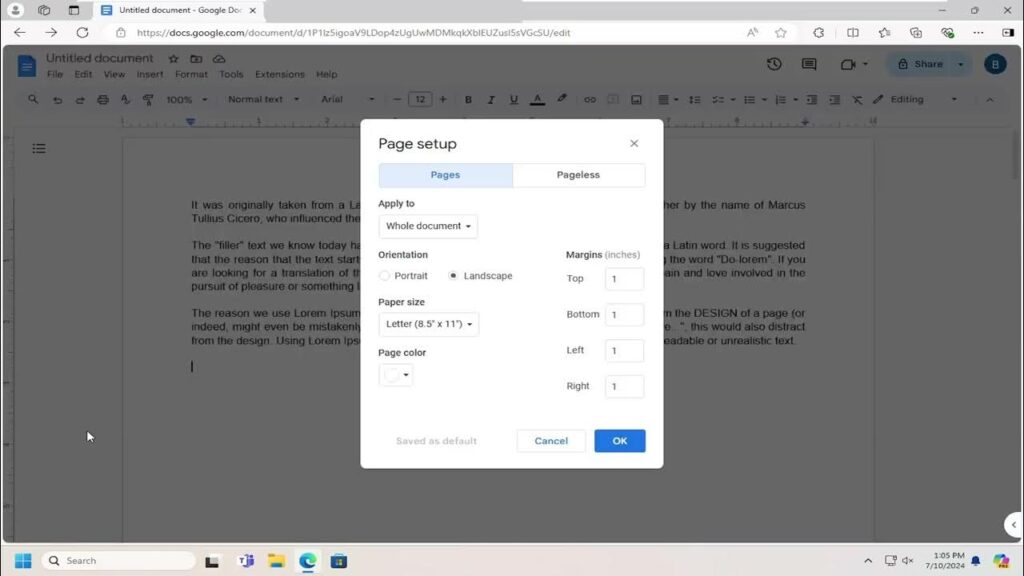
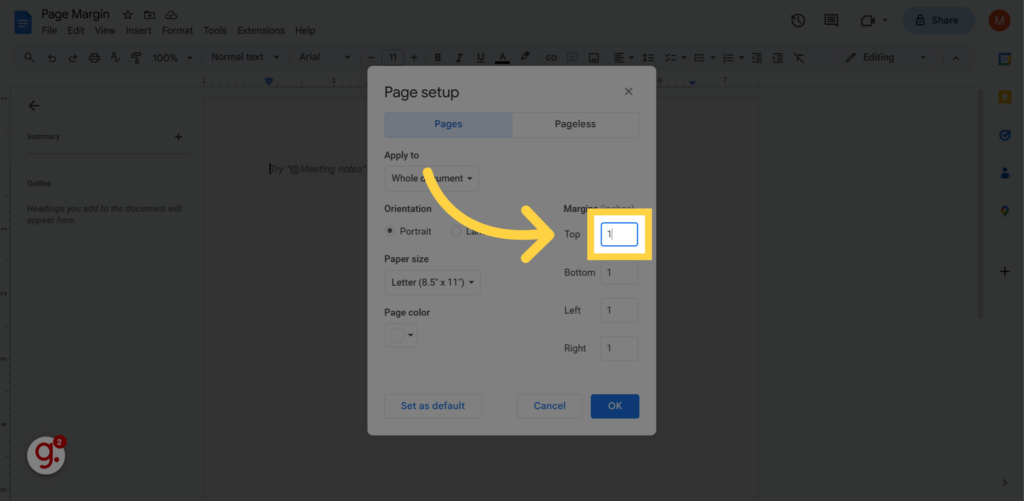
Step 3: Edit The Margins:
- You can edit the margins as per your choice.
- Set the margin dimensions
Step 4: Save The Margins:
- Once you are done with setting up the margins, you can now save your margins
- There are two ways to save your margins – either by clicking “Set as default” or by clicking “OK”.
- If you select “Set as default”, all the new Google Docs you want to create will follow this as the standard setting, but it doesn’t affect the older ones.
- If you select “OK,” only the present document will have this standard setting.
2. How To Change Margins In Google Docs Using The Ruler?
In this second step on “How To Change Margins In Google Docs,” you need to have the Ruler tool.
The ruler tool offers a direct, click-and-drag method for making precise margin changes in Google Docs and enables a hands-on approach to customize the layout of your document.
Step 1: Find And Use The Ruler Tool:
- Go to Google Docs and select an existing document or create a new document.
- It is better to open a document that already has some text on it. If you want to start a new document, add some text so that you can get a visual reference while setting margins.
- After opening the document and placing text on the page, locate the ruler. You can find this tool below the settings bar near the top of the document, which contains numbers and measurement marks. If you can’t find the Ruler option, go to the View menu, and you will find the Show ruler option, and click on that.
- With this ruler, you can change the margins as well as the indents of your text. It ensures that your texts, images, and graphs are well-aligned. After finding the ruler, locate the blue triangles on both sides.
Step 2: Adjust The Margins Using The Triangles:
- Click on the left triangle and drag it to the right or left. This allows you to set the left side margin. The cursor changes to a black arrow when you hover it over the ruler. Release it to set the margin. Similarly, adjust the right margin
Step 3: Edit The Top And Bottom Margins:
- You can even set the top and bottom margins for your documents. Search the vertical ruler on the left side of your document. The vertical margins are shown as solid black lines instead of triangles.
- Move your cursor to the top of the vertical ruler, click and drag it up or down to set the top of the vertical margin. Follow the same steps to set the bottom margin.
How To Change Margins On Different Devices?
Google Docs enables you to change margins across different devices. Whether you want to change the colour, use the text box near the margin settings, or access the existing file, the Google Docs app offers flexibility. If you are an Android user, you can change all margins using a down-facing triangle.
1. How To Alter Margins In Google Docs On iPhone?
You can easily change the margins of Google Docs on iPhone just by tapping page setup and then margins. This method is the fastest and easiest way to make your document look professional when you edit it on a mobile device.
Step 1: Open the document in Google Docs on your iPhone. Click on the three dots in the top right corner and find the menu.
Step 2: Scroll down to select “Page Setup.”
Step 3: Click on Margins and edit your preferred measurements
Step 4: Click OK and apply the changes to your document.
2. How To Change Margins In Google Docs On Android Phones:
It is simple to modify the margin settings in Google Docs on an Android Device. Open the Google Docs app, select the document, and select the pencil icon to edit. Select the three dots in the upper right corner and select “Page Setup.” You can now adjust your margins as per your requirements.
Step 1: Select the Google Docs App on your Android device. Open the document that you want to edit.
Step 2: Click on the edit icon, then access the three vertical dots and select the “Page Setup” option.
Step 3: You can now change the margins by selecting Margins. Adjust the margins as per your requirements.
Step 4: Save your changes.
Final Thoughts
It becomes necessary to change the margins of your documents in Google Docs to meet project guidelines. Just like professors require certain margins for academic papers, your employer may need specific margin requirements for some projects or resumes. Even if there are no specified margin requirements, setting up the margins for the documents you are working on will make your project more professional. Additionally, adjusting margins is often essential after converting external files to improve readability.
So, if you are thinking, “how to change margins in Google Docs,” this blog post is especially for you.
Share your thoughts about this blog post.
Frequently Asked Questions
Q1. How Do I Change Margins In Google Docs On Mobile?
In the Google Docs App, you don’t have a specified margin tool. But, you can even adjust the overall document size by using the ruler in the desktop version.
Q2. Can we set Custom Margins In Google Docs?
Yes, you can customize margins in Google Docs. Go to File>Page Setup and adjust the margin settings.
Q3. Is there any shortcut way to change margins in Google Docs?
There is no direct shortcut to change margins, but with Page Setup or the ruler option, you can quickly set up the required margin.
Q4. Why Is Google Docs Not Letting Me Change The Margins?
If you are finding it difficult to change margins, check that the document is not restricted to permissions. If it is a shared document and has restrictions for editing, ask for editing access.


